TiE23 Posted May 2, 2004 Share Posted May 2, 2004 I still don't know how to put stuff, like light sabers, into peoples hands! any link to a Tutorial will be fine TiE Link to comment Share on other sites More sharing options...
Samuel Dravis Posted May 2, 2004 Share Posted May 2, 2004 I sortof cheated with mine; I just used the sword hilt that Aragorn had in his hand and removed the crosstree (the hilt things that stick out on the sides?). I think manoman just lifted up simon's hand a layer and then put a saber hilt image a layer below that. Pretty simple... I don't know about any tutorials for it though, I use PSP7 and I am pretty much self taught... Link to comment Share on other sites More sharing options...
Samuel Dravis Posted May 2, 2004 Share Posted May 2, 2004 He's got a thing for red sabers... Link to comment Share on other sites More sharing options...
TiE23 Posted May 2, 2004 Share Posted May 2, 2004 Im getting better, now he is holding a light saber hilt TiE Link to comment Share on other sites More sharing options...
TiE23 Posted May 2, 2004 Share Posted May 2, 2004 This would be perfect if I put a light saber hilt in it, but its to complexe Layer One: Solid White bar Layer Two: Normal Layer Three: Overlay Layer Four: Soft Light TiE Link to comment Share on other sites More sharing options...
Samuel Dravis Posted May 2, 2004 Share Posted May 2, 2004 I found a bunch of saber hilts you can use if you're interested. They're hi res too. They might work in that image you got there. Link to comment Share on other sites More sharing options...
TiE23 Posted May 2, 2004 Share Posted May 2, 2004 Originally posted by Samuel Dravis I found a bunch of saber hilts you can use if you're interested. They're hi res too. They might work in that image you got there. Thanks, good find. TiE Link to comment Share on other sites More sharing options...
Astrotoy7 Posted May 2, 2004 Share Posted May 2, 2004 Originally posted by manoman81 Astro, here you go... This special request goes to Rhett from Astrotoy7. You're favorite and mine...Darth Simon. (If you have PS, I have the .psd file if you want it.) That is EXCELLENT Manoman81 ! I hope Rhett likes it, I really do.... I dont have PS but Ive definitely saved that to my pics folder ! an excellent "owned" picture ! mtfbwya Link to comment Share on other sites More sharing options...
Druid Bremen Posted May 2, 2004 Share Posted May 2, 2004 A problem I've been having with making these: How do I make the brush cover the saber with ease? Its like, when I use the brush tool to sketch the saber, and if I try to trace out the saber, my hand shakes or something, so it never is straight. Could someone tell me? Even so.. I feel that this doesn't look so bad.. Link to comment Share on other sites More sharing options...
manoman81 Posted May 2, 2004 Share Posted May 2, 2004 Yeah, it is a pain trying to get the hilt in. What I do is use the magic, background eraser tool to isolate the hilt. Then I zoom way in to clean up any of the misc. colors floating around the hilt. If you mean the color of the blade, you can edit that in the layer options window (double click the layer) and go to Outer Glow. The link I posted shows how to change all of that This is what I did for Simon: 1. Cropped the area around Simon's hand. Select all>create new picture>paste 2. Resized the hilt down to a managable size. 3. Drag and drop the hilt layer on to the hand 4. Depending on the machine you use, press Ctrl/Cmd+T while the hilt layer is highlighted to get 'Free Transform' (I think that's what it is called) 5. Go to the corners of the box and move you cursor out to where the cursor turns into a curved, double arrow. Use this to rotate the hilt into place. 6. With the hilt layer still selected, click on the layer mask button at the bottom. (the one with a cirlce in a square.) This will put a white rectangle on the layer in the layer list. 7. Make sure that your colors are set to default and black as your foreground color. 8. With the layer mask selected (the little picture on the layer list will have a border on the inside of it), use the paint brush to paint over the hilt where the hand should hold it. This is an easy way to hide parts of a picture with out trying to erase it. Merge all of the layers together on this pic. 9. Go back to the original pic of Simon. Delete the crop step to brng back simon. Drag the hand pic to where it matches up on the original. 10. Create the saber blade. I realized that doing the crop, copy, paste was an extra step. It was just easier to zoom in on a smaller area than the whole huge pic. I found the original SImon pic through a Google Image Search. It had a white background that I changed to black becasue the blade didn't show up to good agains the white. Hope this helps some of you when trying to get the hilt to look right. Link to comment Share on other sites More sharing options...
Samuel Dravis Posted May 2, 2004 Share Posted May 2, 2004 I just draw a point to point line for the core, then use the blur filter at different strengths, creating a new layer for each one. When that's done, I merge all the saber layers, and color it (I like being able to change the color). Link to comment Share on other sites More sharing options...
Sam Fisher Posted May 2, 2004 Share Posted May 2, 2004 How about trying some other actors hands? Like Elrond? Or Legolas? Or maybe some of the ladies? Link to comment Share on other sites More sharing options...
manoman81 Posted May 2, 2004 Share Posted May 2, 2004 Did my best. Couldn't find any really good pic of Liv where I could insert a hilt. Link to comment Share on other sites More sharing options...
--ZeeMan-- Posted May 2, 2004 Share Posted May 2, 2004 here's my first attempt Link to comment Share on other sites More sharing options...
TiE23 Posted May 2, 2004 Share Posted May 2, 2004 All I need to now is how do you put one layer on top of another, cause I lasso the hand, make the hand a new layer by ctrl+J, then I have the hilt, but the hilt won't go under the hand, the only I figered out how to fix it is to create a copy of the pic with the person and move them to there with the hilt first, then the hand, so hand will cover the hilt, I did this with the jar jar pic All I need to now is how do you put one layer on top of another! I know there must be a button or something that---- never mind, a thought just popped in my head, I clicked and held the layer on the layer list, and moved it up TiE Link to comment Share on other sites More sharing options...
TiE23 Posted May 2, 2004 Share Posted May 2, 2004 I think he looks cool. Much Much Much Easier Instructions 1:Get you hilt, lasso it, leave it. 2:Go to pic with person, lasso fingers, then press ctrl+J (That puts the hand on a new layer) 3:Bring hilt to picture, then postion it in the hand. (Well, its really just on the hand) (So now you have the hilt layer, extra fingers layer, and backround.) 4:Place hands back to were they belong if you moved them, if the hilt is still above the hands, don't worry, go to the layers list, click and drag the hand layer up (or down) past the hilt layer, viola! Hand layer is above hilt layer! 5:Create saber blade Light Saber Tutorial TiE Link to comment Share on other sites More sharing options...
MennoniteHobbit Posted May 2, 2004 Share Posted May 2, 2004 Originally posted by --ZeeMan-- here's my first attempt It looks good, Zee, but in the future make sure that the lightsaber blade is parellel to the saber handle. In that pic, you should rotate the blade about 1-2 degrees counterclockwise, then it'd be perfect! Meh I don't have the time to download PhotoShop, as I have dial up. GrRRR Link to comment Share on other sites More sharing options...
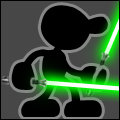
TiE23 Posted May 2, 2004 Share Posted May 2, 2004 He will kick your ass, and send you to hell. I know,I know, the saber is really thick. >_> TiE Link to comment Share on other sites More sharing options...
Boba Rhett Posted May 2, 2004 Share Posted May 2, 2004 Nice green foam wiffle bat. *giggles* Link to comment Share on other sites More sharing options...
Mike Windu Posted May 3, 2004 Share Posted May 3, 2004 Looks like something Lexx was ridiculed of once when she had a pink one in her avatar. ^_^ Link to comment Share on other sites More sharing options...
IG-64 Posted May 3, 2004 Author Share Posted May 3, 2004 Originally posted by Mike Windu Looks like something Lexx was ridiculed of once when she had a pink one in her avatar. ^_^ I remember that O_o Link to comment Share on other sites More sharing options...
Crow_Nest Posted May 3, 2004 Share Posted May 3, 2004 ROFLMAO!! The simon one was great! Link to comment Share on other sites More sharing options...
manoman81 Posted May 3, 2004 Share Posted May 3, 2004 Thanks, Tie. I'll have to check that out after finals are over. Zee, looks good for first try. Just do what Mennonite said. Wiffle bat....... Link to comment Share on other sites More sharing options...
Pie™ Posted May 3, 2004 Share Posted May 3, 2004 I made a try too I'll have to try more [EDIT] 2 more, from The Crow If Eric and Top-Dollar had lightsabers This didn't turn out very good, but I tried to give it a darkish-red look, because it has just been stabbed through him... I wanna make more! Link to comment Share on other sites More sharing options...
Samuel Dravis Posted May 3, 2004 Share Posted May 3, 2004 Hey Pie, when I tried editing your top pic of Aragorn, I noticed that the saber would have to be smaller than the blade (otherwise it would look too big). So I went and just removed the sword blade entirely, as well as the crosstree. Then I put my saber blade on top. It looks pretty good. Link to comment Share on other sites More sharing options...

Recommended Posts
Archived
This topic is now archived and is closed to further replies.